Smoke Alarm Troubleshooting
Browse USI smoke alarm troubleshooting guides for chirping, warning sounds, LED lights, battery changes, power issues, testing, cleaning, and replacement.
Related Topics:

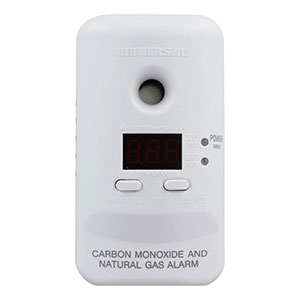
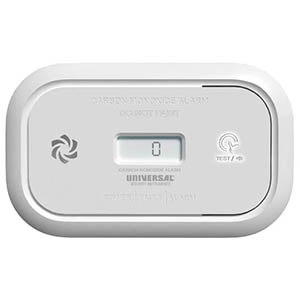
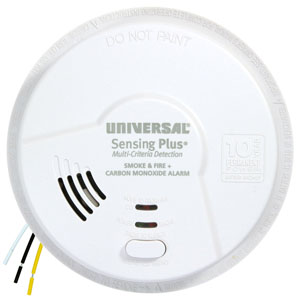
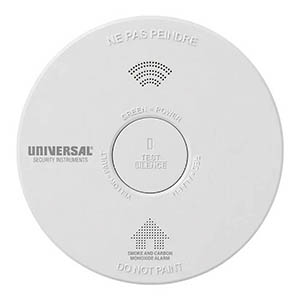
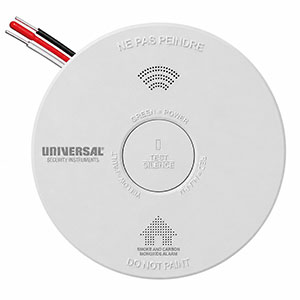
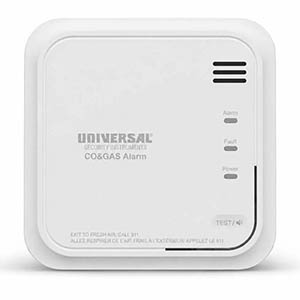
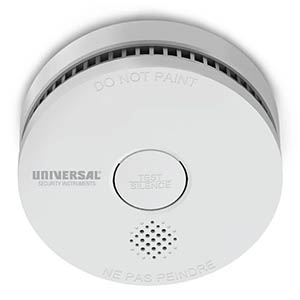
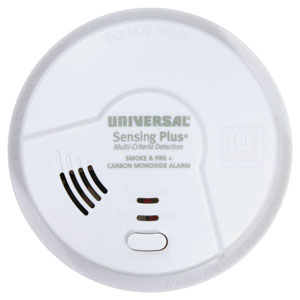
Regularly testing your smoke alarm is one of the simplest ways to help ensure your home's fire protection system is working properly. Whether you own a battery-powered or hardwired Universal Security Instruments (USI) smoke detector, the built-in test button allows you to check its operation without creating smoke or starting a fire.
This guide explains how to test a USI smoke alarm, what to expect when pressing the TEST or TEST/SILENCE button, how to check interconnected smoke detectors, and what to do if your alarm fails to respond.
Weekly testing: Universal Security Instruments recommends weekly testing for many of its smoke alarm models. This helps identify power problems, equipment faults, and other operational issues.
After maintenance: Test your smoke alarm after installing it, replacing a battery, or completing manufacturer-approved maintenance.
General fire safety guidance: The U.S. Fire Administration recommends testing smoke alarms at least once a month. Always follow the testing frequency specified in your USI alarm's user manual.
Most Universal Security Instruments smoke detectors feature a TEST or TEST/SILENCE button. While the exact procedure varies by model, the following steps provide a general guide for testing your smoke alarm.
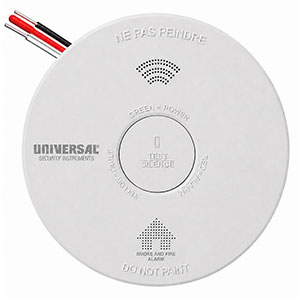
Find the TEST or TEST/SILENCE button on the front of your USI smoke detector. Depending on the model, it may be a separate button or part of a larger central control.
Before starting, notify other household members that you are testing the alarm. The test produces a loud warning sound that may also activate other interconnected alarms.
Make sure the smoke alarm is installed and powered according to the manufacturer's instructions.
A normal power indicator does not guarantee that every component of the alarm is functioning correctly. The alarm must still pass its required test.
Press and hold the TEST or TEST/SILENCE button for the duration specified in your smoke alarm's user manual.
Some USI models respond after approximately two seconds, while others require holding the button for five seconds or longer.
Do not assume your smoke alarm is defective simply because a brief tap does not produce a sound. Some USI models require the button to be held before testing begins.
During a successful test, your smoke detector should produce the alarm signal described in its user manual.
Many residential smoke alarms use a repeating pattern of three loud beeps followed by a pause for smoke/fire detection.
Combination smoke and carbon monoxide alarms may also test their carbon monoxide warning function, producing a separate four-beep pattern or a voice announcement.
If the expected audible signal does not occur, the alarm may have a power, battery, activation, or equipment problem.
Some USI smoke alarms flash a red LED during testing. Hardwired models may also display a green AC power indicator.
Compare the LED behavior with the model-specific instructions. A missing or unusual indicator may provide additional information about the alarm's operating condition.
Once the testing procedure is complete, the alarm should stop sounding and return to its normal standby condition.
Check that any normal power or standby indicator is operating as described in the manual. If the alarm continues chirping, produces a fault warning, or does not return to its expected status, investigate the warning before relying on the unit.
Smoke alarm test sirens are intentionally loud. Notify everyone in the home before testing, avoid placing your ear near the alarm, and follow any hearing protection recommendations in the product manual. Choose a consistent day each week to make testing part of your home maintenance routine.
Different Universal Security Instruments smoke detectors may require different test-button procedures. The following chart provides examples from official USI setup and troubleshooting documentation.
| USI Model | Test Button Instructions | What to Verify |
|---|---|---|
| USI/SM/REP | Press and hold TEST/SILENCE for approximately 2 seconds during the activation test. | The alarm responds with its expected audible signal. |
| USI/SM/HWREP | Use the TEST/SILENCE button according to the product manual. | The audible test operates and the AC power indicator is normal. |
| USI/SM/10YR | Press TEST/SILENCE according to the setup instructions. | The sealed-battery alarm produces its expected test signal. |
| USI/SM/HW10YR | Press and hold the TEST button for at least 5 seconds as directed in the troubleshooting guide. | The alarm sounds and its expected power indicators are operating. |
| USI/SM/HW10YR/P | Press and hold TEST/SILENCE to confirm operation. | The alarm responds and the green AC power indicator is illuminated. |
| USI/SMCO/HW10YR/P | Press TEST for more than 1 second according to the manufacturer setup guide. | The combination alarm responds to the test procedure. |
| AMIC1510SB | Press and hold the test button through the smoke and CO test sequence. | The manufacturer specifies a 3-beep smoke pattern followed by a 4-beep CO pattern. |
Important: These examples apply to the specific models listed and are not universal instructions for every USI alarm. Older or discontinued smoke alarms may use different buttons, timing, indicator lights, or audible test patterns. Always refer to the manual for your exact model.
Hardwired smoke alarms receive their primary electrical power from the home's wiring system. Many Universal Security Instruments models also include a backup battery that helps maintain protection during an electrical outage.
Testing a hardwired smoke detector generally follows the same button-based procedure as a battery-powered alarm, but you should also verify the unit's expected AC power indicator.
If the smoke detector does not respond, check the manufacturer's troubleshooting instructions. An electrical supply problem, improperly installed backup battery, or defective alarm may prevent successful operation.
Do not remove electrical connectors or handle household wiring while the circuit is energized. Have unresolved electrical problems inspected by a qualified electrician.
Interconnected smoke alarms provide additional protection by allowing compatible alarms to communicate with one another. When one connected alarm detects smoke, the other alarms in the system are designed to sound as well.
For supported USI systems, the TEST button can also help verify that the interconnected alarms respond correctly.
For example, USI's setup documentation for the USI/SMCO/HW10YR/P combination alarm instructs users to test each interconnected unit individually.
If the initiating alarm sounds but the other interconnected detectors do not respond, the system may have a compatibility, power, or interconnect wiring problem.
Possible causes include:
Consult the compatibility requirements for each alarm. USI warns that connecting incompatible equipment may cause improper operation or equipment damage. Have unresolved hardwired interconnection problems inspected by a qualified electrician.
On compatible interconnected systems, pressing the TEST button on one alarm may cause the other connected alarms to sound. This can help confirm that the interconnection signaling is functioning.
However, this does not replace individually testing every smoke alarm. Each alarm should be tested according to its own manufacturer's instructions to verify that its local test function and audible warning operate correctly.
If you press the TEST button and your USI smoke detector does not sound, do not assume the alarm is providing adequate fire protection. The problem may be related to the battery, electrical power, activation procedure, or a malfunctioning unit.
| Possible Problem | What to Check | Recommended Action |
|---|---|---|
| Button Not Held Long Enough | The model may require the TEST button to be held for several seconds. | Repeat the test using the exact instructions in the user manual. |
| Weak or Missing Battery | A replaceable battery may be depleted or incorrectly installed. | Install the manufacturer-approved battery and retest. |
| Sealed Battery Not Activated | The required activation tab or mounting procedure may not have been completed. | Follow the model-specific activation instructions. |
| AC Power Not Available | A hardwired alarm may have lost power. | Check the circuit breaker and expected AC indicator. Contact an electrician if necessary. |
| Sensor or Internal Fault | The alarm may be displaying a fault warning or failing to respond correctly. | Follow the manufacturer's troubleshooting instructions and replace the unit if required. |
| Alarm Reached End of Life | The smoke detector may have exceeded its specified service life. | Replace the entire alarm with an appropriate compatible model. |
If your smoke alarm uses a replaceable battery, verify that the correct type is properly installed.
For example, the USI/SM/REP manufacturer troubleshooting guide recommends checking the battery installation and replacing it if the alarm does not sound during testing.
For sealed-battery models, confirm that the manufacturer-required activation procedure was completed. Do not attempt to open or replace a sealed internal battery.
For hardwired smoke alarms, check the expected AC power indicator and circuit breaker.
If the green power LED is unexpectedly off on a model that normally displays one, the alarm may not be receiving AC electricity.
If power problems remain unresolved, contact a qualified electrician. Do not attempt to repair or modify household electrical wiring as part of routine alarm testing.
Some sealed-battery USI alarms require removing a battery activation tab or securely mounting the unit before they can operate normally.
For example, the USI/SM/HW10YR/P automatically activates its internal backup battery when mounted according to the setup instructions.
If a newly installed alarm does not respond, verify its model-specific activation requirements before repeating the test.
Some USI smoke alarms use intermittent chirps, LED flashes, or voice messages to report a sensor malfunction or the end of the alarm's service life.
These conditions may prevent the device from operating properly even when electrical power is available.
If the alarm reports an unresolved fault, fails testing after approved troubleshooting, or has reached its specified replacement age, replace the unit according to the manufacturer's instructions.
For routine household testing, use the built-in TEST button as directed by Universal Security Instruments.
Do not use matches, candles, open flames, burning paper, or uncontrolled smoke to test your smoke detector. These methods can create a fire hazard, contaminate the sensing chamber, or damage the alarm.
Some manufacturer-approved procedures may permit specialized listed smoke alarm testing products. Such products should only be used when specifically allowed by the alarm's instructions and used exactly as directed.
The built-in test button remains the recommended method for regular homeowner testing.
Regular smoke alarm testing is also a reminder to review your household fire escape plan. Make sure everyone recognizes the alarm sound, knows two ways out when possible, and understands where to meet outside. Practice escaping rather than trying to investigate or silence an alarm during a real emergency.
A smoke alarm that does not respond to its required test may need to be replaced. Most residential smoke alarms also require replacement after approximately 10 years, regardless of whether they continue to receive electrical power.
Consider replacing the alarm when:
Before purchasing a new alarm, verify the replacement model's mounting, electrical connector, and interconnect compatibility requirements.
Locate the TEST or TEST/SILENCE button and press it according to your alarm's user manual. Hold the button for the required duration until the expected audible test signal occurs. Verify that the alarm returns to normal operation after the test.
USI recommends weekly testing for many of its smoke alarm models, while general U.S. fire safety guidance recommends testing at least monthly. Follow the schedule in your specific product manual and test after installation or battery replacement.
The button may not have been held long enough, the battery may be depleted or incorrectly installed, or the alarm may have a power or equipment problem. Follow the model-specific test procedure and troubleshoot the power supply. Replace an alarm that continues to fail testing.
The required duration varies by model. For example, the USI/SM/REP setup guide specifies approximately two seconds for its activation test, while the USI/SM/HW10YR troubleshooting guide instructs users to hold the button for at least five seconds. Check your exact model's manual.
Follow the TEST button procedure on one alarm and verify the expected response from the other compatible interconnected units. Repeat the test from each alarm according to the manufacturer's instructions. If the system does not respond correctly, check compatibility and have wiring issues inspected by a qualified electrician.
Yes. Most USI smoke detectors are designed to be tested while mounted in their normal installed position using the TEST or TEST/SILENCE button. Follow the manufacturer instructions and avoid removing or disconnecting a hardwired alarm unnecessarily.
If the alarm continues to fail its required test after the manufacturer-approved power, battery, and activation checks, replace it or obtain manufacturer service as directed. Do not rely on an alarm that cannot demonstrate proper operation.
If your smoke alarm fails testing, continues chirping, or displays an unexpected warning, these resources can help you identify the cause.
If your smoke alarm no longer responds to testing, has reached the end of its service life, or reports an unresolved fault, replacing it may be necessary. Universal Security Store offers battery-operated, hardwired, and combination smoke alarms for a variety of home safety needs.
Explore related support articles and resources for this topic.
Browse USI smoke alarm troubleshooting guides for chirping, warning sounds, LED lights, battery changes, power issues, testing, cleaning, and replacement.
Contact options may differ depending on the type of help you need.